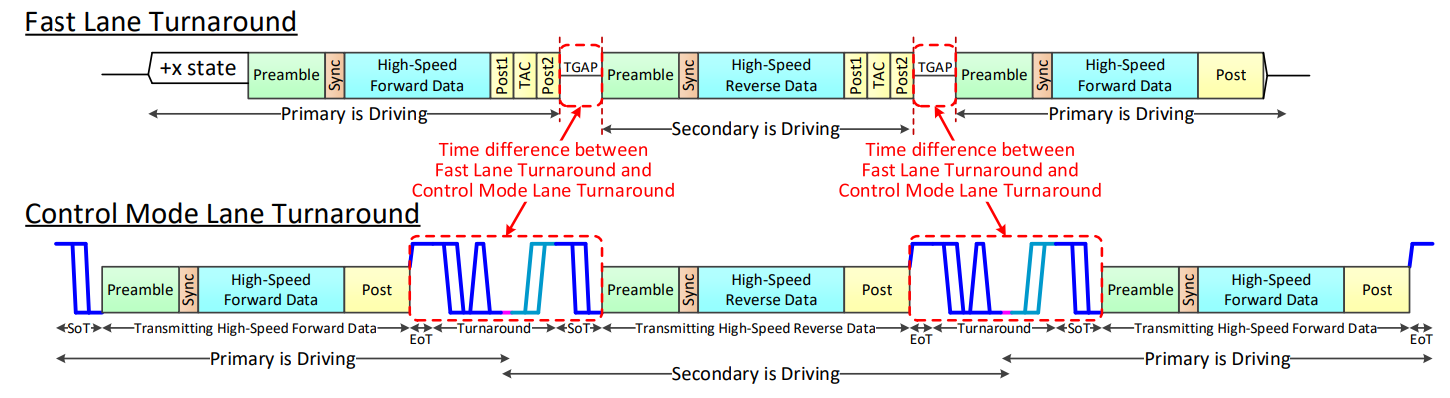
Figure 11: MIPI C-PHY Lane Turnaround Comparison
Figure 11: MIPI C-PHY Lane Turnaround Comparison
(function() {
var cx = ‘002339061988669470749:sbod4_eqkog’;
var gcse = document.createElement(‘script’);
gcse.type = ‘text/javascript’;
gcse.async = true;
gcse.src = ‘https://cse.google.com/cse.js?cx=’ + cx;
var s = document.getElementsByTagName(‘script’)[0];
s.parentNode.insertBefore(gcse, s);
})();